Resizing and cropping images
26 February 2017
Intended audience: store owner
Downloading, or uploading, big images is always bad news as it just takes an absolute age. Including big, oversized images in websites and marketing emails only to resize them to the correct size on the client application is a very common mistake. If you do this you will make your website and emails slower than they should be, even unusable. And with the explosion of people accessing these on smartphones often with a slow connection and data limits it is even more important to get it right.
As a rule all images should be correctly sized before uploading them into your website or email. And resizing an image is much quicker than trying to upload a big one.
Images used in FoodCommerce
In FoodCommerce there are two places to upload images:
- the image library through products, categories and producers
- the "media and files" tab in theming
The image library
Uploading a big image file into the image library will not cause a problem except for the time taken by the initial upload. If an image uploaded to our server is too big it is automatically scaled down to 2048px x 2048px simply not to waste valuable storage space.
The required size of a product, category or producer image is specified in the server side code on any webpage it is used on. When the webpage is requested the image is then dynamically resized at the server before being downloaded by the visitor’s browser.
<img src = "{{ SelectedProduct.ImageUrl(237, 237) }}" alt = "{{ SelectedProduct.Name }}" >
In this example the image size is specified as 237px x 237px. If the original image was smaller or not a square shape then transparent space is added. Images are never stretched.
In general uploading a smaller image will save you a lot of time so it is well worth doing. The exact size doesn’t matter as long as it is as big as the biggest instance where it is used. If you are unsure then 1024px x 1024px is an ideal size to upload.
Media and files tab
Images uploaded here are for insertion into static pages and are not changed by FoodCommerce in any way. They therefore need to be correctly sized before they are uploaded.
Image editing software
To change the dimensions or to crop an image you will need image editing software. If you are using a Mac there is one already installed named "Preview" and there is an excellent article on how to resize and crop images at www.wikihow.com/Resize-Pictures-(for-Macs).
If you are using a PC then you will need to install some image editing software and the good news is that there are some excellent free ones out there. The best place to download one from is Ninite which is a brilliant website used by IT pros to download, install and update all manner of free and open source software. Choose Gimp (or if you want something simpler Paint.Net) and click on the "Get Your Ninite" button. Double click the downloaded file and it will download the software you have chosen and install it without any fuss or unwanted junk.
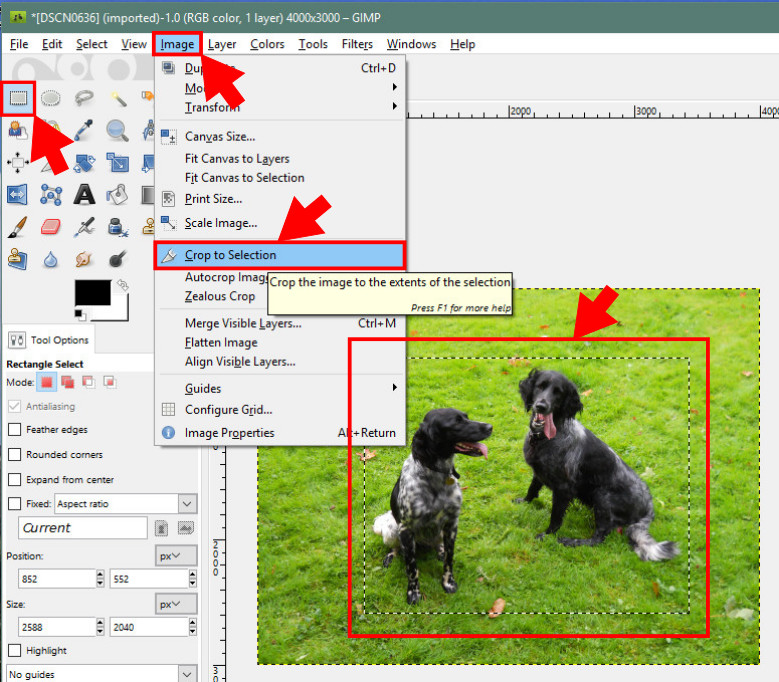
Cropping an image with Gimp
- Click and drag the rectangular selection tool over the part of the image you want to keep. If necessary, each side can be dragged to fine tune your selection.
- Click on the "image" menu and then "crop to selection".
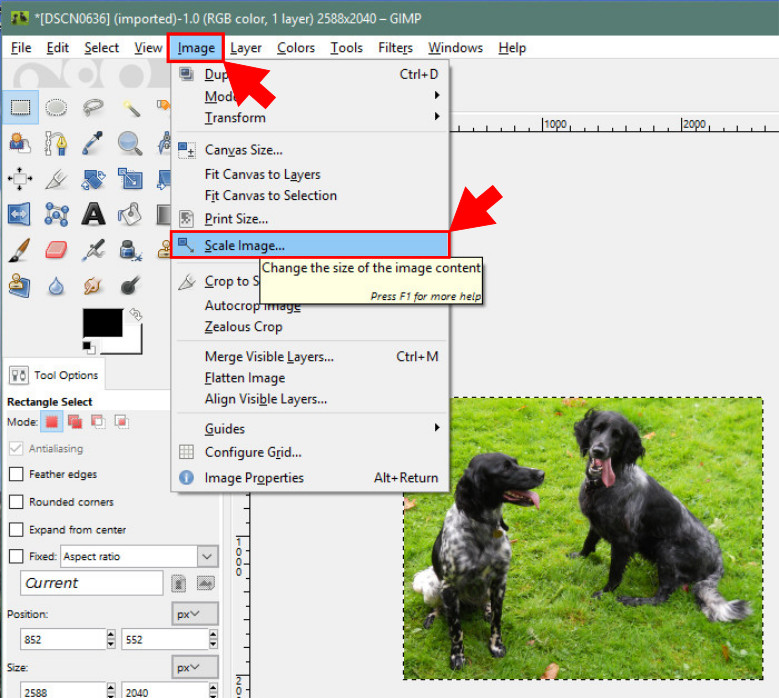
Resizing an image with Gimp
- Click on the "image" menu and then on "scale image".
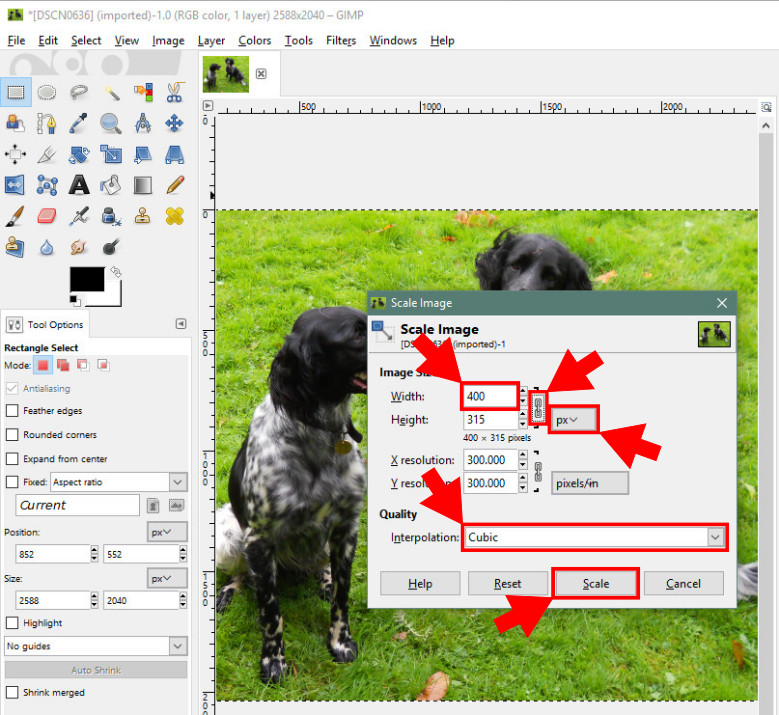
- Ensure the chain link is not broken so that the height remains proportional to the width.
- The unit of measure should be "px" (pixels).
- Type in the image width (or height) you require.
- For most images setting the interpolation to "cubic" should give the best results.
- Click "scale".
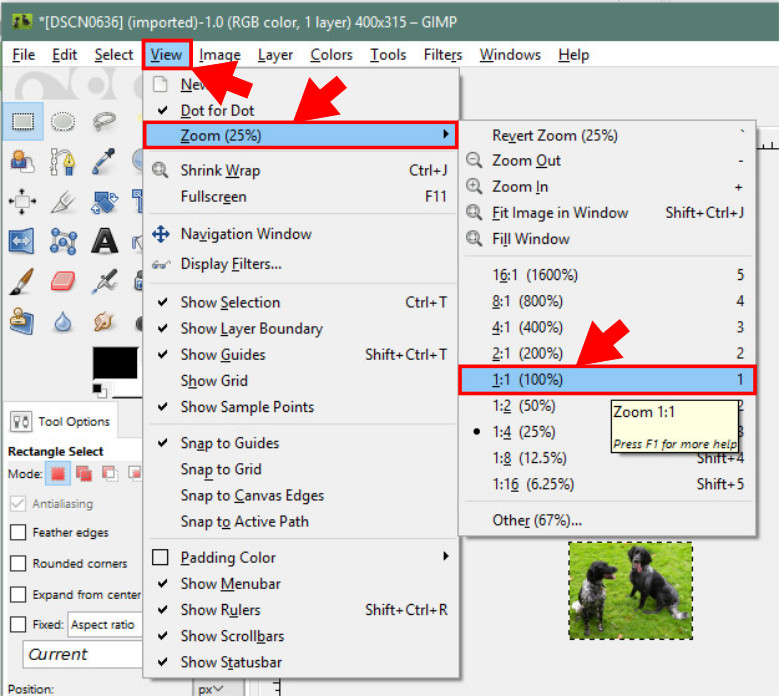
Change the zoom to full size
- Click on the "view" menu and then on "zoom".
- Click on "1:1 (100%)".
Export your modified image
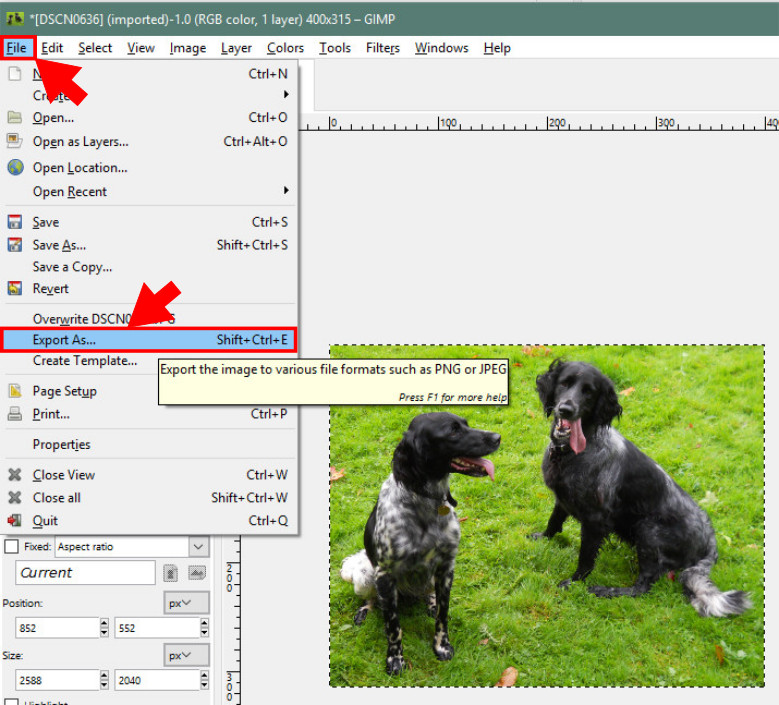
- Click on the "file" menu and then on "export as...".
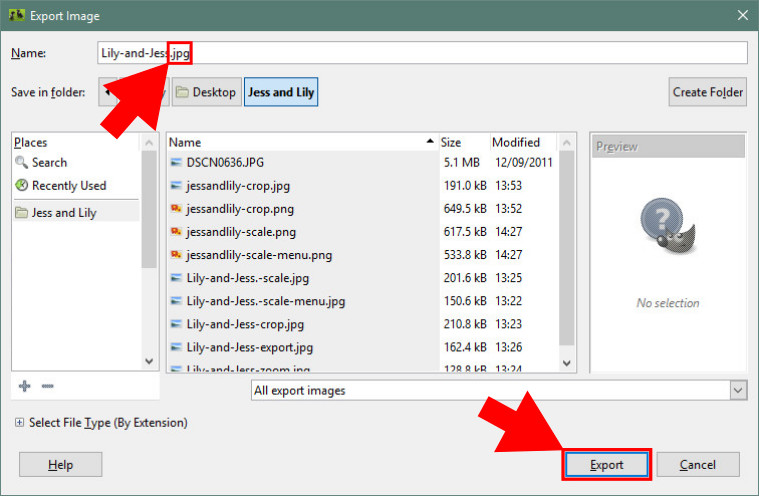
- Choose the folder, file name and file extension. If there is no transparency in the image then the file extension should be ".jpg" as this will be a smaller file. If the image has transparency then use the ".png" extension.
- Click "export".
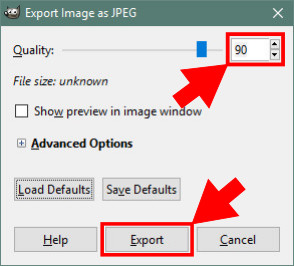
- In the JPG dialog box set the quality at 90.
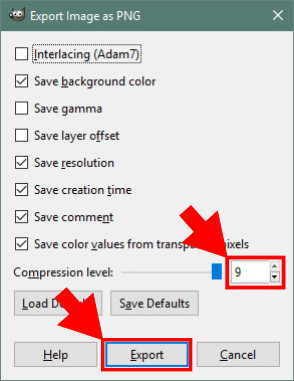
In the PNG dialog box always set the compression level at 9. - Click "export".

Tony Fear